Note: This post is a part of GrillGirl's Big Green Egg Series, a deep dive into the popular Kamado style grill and all that it offers. Follow along on this adventure if you have ever been curious about getting an Egg or want to better understand how to get the most out of your Egg.
It's time to start planning that perfect turkey on your Big Green Egg for Thanksgiving.
When we talk BGE turkey recipes there are indeed a lot of things to cover. But at the end of the day, it comes down to this — it's really simple and fun to cook turkey on a Big Green Egg.
There are many ways that you can prepare a turkey.
Wet brine, dry brine. Injected. Cut up, spatchcocked, or whole. To stuff or not to stuff? These are the questions.
Entire cookbooks have been written on the subject. Not only are there dozens of ways to make a turkey, there are dozens of types of turkeys to choose from: fresh, frozen, organic, free-range, self-basting/enhanced.
Turkey is something that most of the US agrees we should be having on the fourth Thursdays of each November. In fact 88% of Americans have turkey on Thanksgiving each year. With so many types of turkeys and methods to prepare, it's easy to see why.
Don't worry, cook turkey
All of the above can seem a bit overwhelming, but it's not. No matter what type of turkey or method of preparation you’ve chosen, the cooking principle on the Egg won't vary.
I’ve decided for the sake of this write-up to focus on the straight-forward process of getting your Big Green Egg set up, and your turkey cooked, no matter what method of preparing the bird you have chosen or when you're cooking it. Turkey is great anytime of year, not just Thanksgiving.
For this exercise I will be using a frozen, enhanced turkey from my local market.
With an estimated 46 million turkeys being cooked on Thanksgiving, there’s a pretty good chance that the majority of them are going to fall into that category. As mentioned, even if you’ve chosen a different method, the set up and cooking principle on the Egg won't vary.
Enhance? Yes, I said enhanced. It can also called self-basting. If your turkey is labeled enhanced or self-basting it has been injected with a solution of broth, salt, phosphates, sugar, and flavorings intended to add moisture and taste to your bird. Around 30% of all poultry raised in the US will be enhanced for sale.
Let's get stared with some turkey basics and work our way up to the cook.
How much turkey do you need?
The general rule of thumb is 1 pound per person. This simple one to one ratio should feed everyone well and still allow you a good amount of tasty leftovers for those day after Thanksgiving snacks.
Thawing a turkey
Since we are starting with a frozen bird we need to thaw that thing. A frozen turkey can remain safe indefinitely.
As soon as the turkey begins to thaw, any bacteria that may have been present before freezing will begin to grow. There are a few recommended ways to thaw your frozen turkey. The two we’re going to cover are refrigerator thawing and cold water thawing.
USDA says refrigerator thawing
The USDA considers refrigerator thawing to be the safest way to thaw your turkey. This is because the turkey will thaw at a consistently safe temperature.
It's pretty simple. Place your turkey in the fridge on a rimmed sheet pan, or similar, to catch any leaks that there may be in the turkey's packaging and let it sit.
It will take about 24 hours per every 4-5 pounds of turkey. A 16-pound turkey will take about 4 days to thaw in the fridge.
Cold water thawing method
For this method place your bird in the original packaging in a sink full of cold. Change this water every 30 min. The turkey will defrost at about a rate of one pound every 30 min.
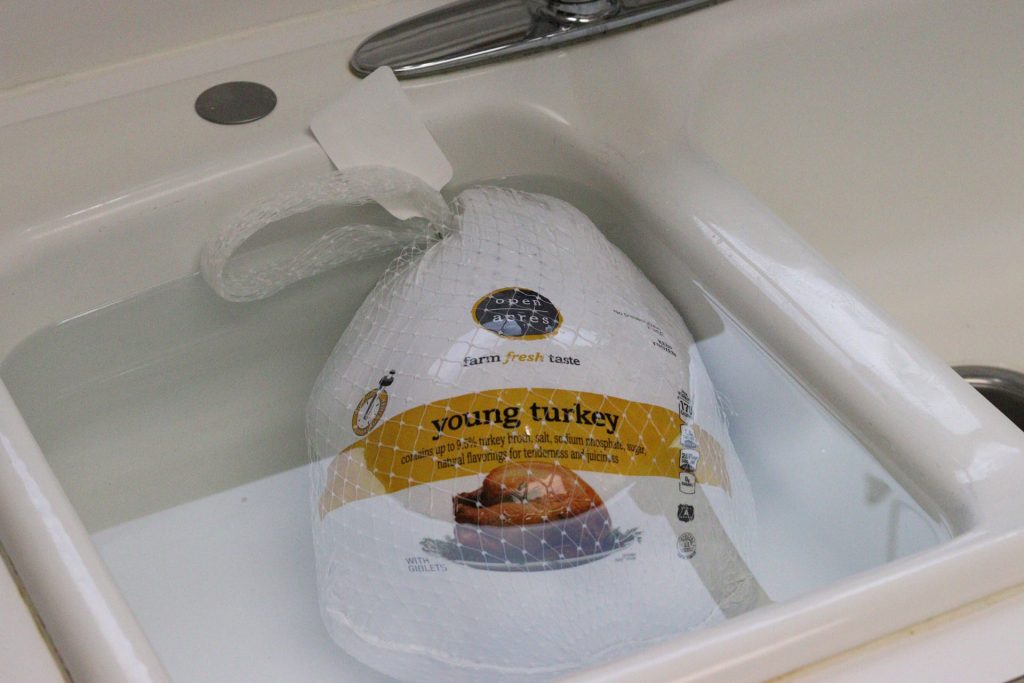
Your 16 pound turkey will take about 8 hours to thaw.
YOU MUST COOK THIS TURKEY ONCE THAWED. No going back in the fridge overnight. It must go right on the Big Green Egg to remain safe.
I’d also like to touch on another thing. You can, in a bind, cook a fully frozen turkey. It's going take about 50% longer to get done but you can do it. For more info on how to safely thaw a turkey head over to foodsafe.gov
Turkey Cook Times
So the bird is thawed and we need to get it on the fire. Before we do that let's touch base on the cook times.
While we always cook to the internal temperature of the meat, it’s good to have some idea of just how long that’s going to take.
The following are some estimated cooking times based on temperature for a 15-16 pound turkey:
- 425°F for 3 to 3 1/4 hours
- 400°F for 3 1/4 to 3 1/2 hours
- 350°F for 3 1/2 to 3 3/4 hours
- 325°F for 3 3/4 to 4 hours
Remember, you always need to cook your turkey to a minimum internal temperature of 165°f in all parts of the bird, no matter how long it's been cooking. The temperature of the bird should be checked with a digital instant-read thermometer like a Thermapen or Thermpop from Thermoworks.
How to Cook a Turkey on a Big Green Egg
Let's get this turkey cooking on the Big Green Egg!
Get your Big Green Egg fired up. Light the Egg, add your wood chunks if desired and drop in the convEGGtor for indirect cooking at 350°f.
If you need a refresher on using a Big Green Egg, take a look at the “HOW TO LAY A FIRE AND CONTROL THE TEMP IN YOUR BIG GREEN EGG”
Smoke as a flavor
This is a great time to talk about the smoke. Here are a few great wood options to complement your turkey: Apple, Cherry, Pecan or Oak. Poultry takes on a lot of smoke easily.
For my taste a little wood goes a long way. I use one or two rather small chunks of wood to avoid over-smoking the bird. The more smoke/wood you add, the darker your bird is going to end up.
At some point it just becomes unattractive and a tad bitter. That being said, if you want a dark, smoky bird I totally support you adding more of your favorite wood chips or chunks. If you're not sure exactly what you like, you can easily run a few test cooks with a chicken (or two) to get a better understanding of just what wood and smoke flavor you like the most.
Basic stock recipe

Drip Pan with a Basic Stock
While the Egg is warming up, set up a drip pan that will go on top of the convEGGtor and under the cooking grate. This is where you gather the gravy goodness.
There are a few options for you at this point. Both options will use a ½ size disposable aluminum pan. The option is what goes in the pan. This pan requires liquid to keep the dripping from burning. You can simply add a ready-made stock to the pan or you can add some celery, carrots, onions, and water to make your own homemade stock as you cook the turkey.
My simple stock consists of:
- 2 cups celery course chopped
- 2 cups onions course chopped
- 2 cups carrots course chopped
- 6 cups of water
No matter which option you pick, you will need to be sure to keep liquid in the aluminum pan as it will be boiling. If you don’t, that pan is going to burn. Keep this in mind when placing your turkey on the cooking grate.
Leave yourself some room to safely pour this additional liquid into the drip pan below without spilling any onto the convEGGtor. Another tool you may want to consider adding is a Big Green Egg Disposable Drip Pan Large.
Putting the bird on the egg
Remove the giblet bag from the neck cavity at the front of the bird. Your turkey may also have a plastic thing at the back holding the turkeys legs together. This is known as a hock lock.
While it is safe to cook with the hock lock in the turkey. I suggest you remove it altogether. If your bird has one of those “pop up when it’s done things” then take it out. Don’t worry about the hole. An instant read thermometer is a much better option to let you know when your bird is done.
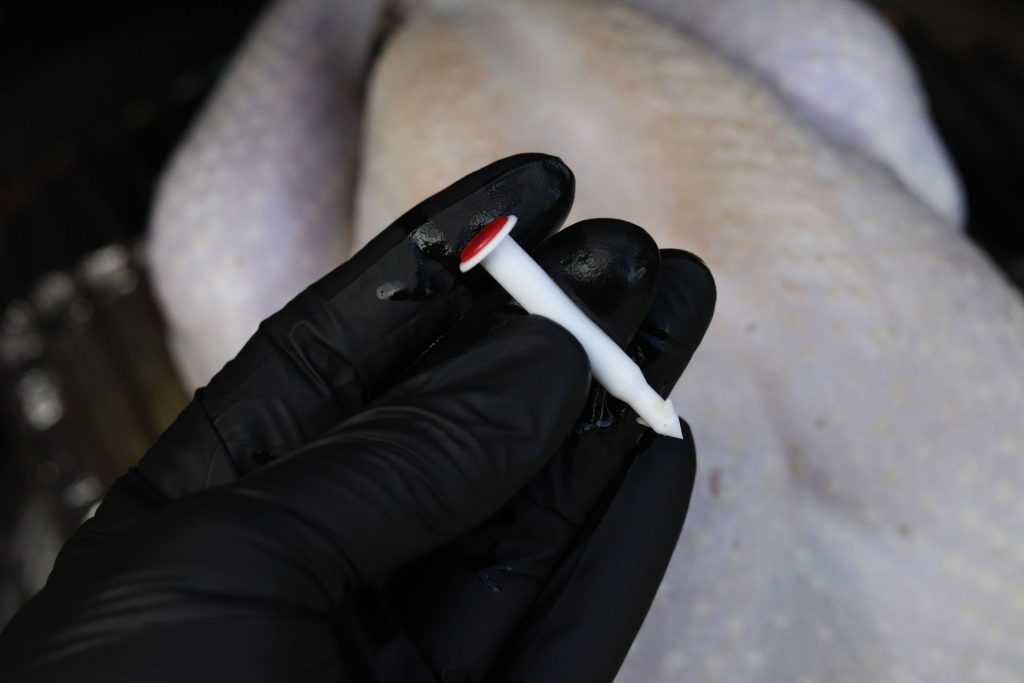
Remove the pop up Turkey timer
I place half an apple into the neck cavity. This will help prevent this area from over-browning. I also place a few apple and onion quarters into the main cavity of the turkey. It really makes for a better presentation, as well as brings an extra bit of flavor.

1/2 apple in the neck cavity helps a lot
Pat the turkey skin dry with a paper towel and add a light dusting of kosher salt to help crisp up the skin. I don’t salt to the inside of an enhanced turkey. It has been salted by the enhancement injection already.
Once your turkey is prepped, get your egg running at your desired cooking temperature. I like to smoke roast turkeys at 350°f.
While you certainly can do this cook without one, if you own a smoke controller I suggest you use it. Let’s face it you have a lot going on for the holiday. I like to use the FlameBoss 400. It allows you to focus on the other aspects of the day while it minds the Big Green Eggs temperature for you.
Smoke roast your bird to an internal temperature of at least 165°f. Check this in multiple locations to be sure you bird is safe. Check the breast as well as deep into the thigh. Be sure you are not touching bones as that can give you an inaccurate reading.
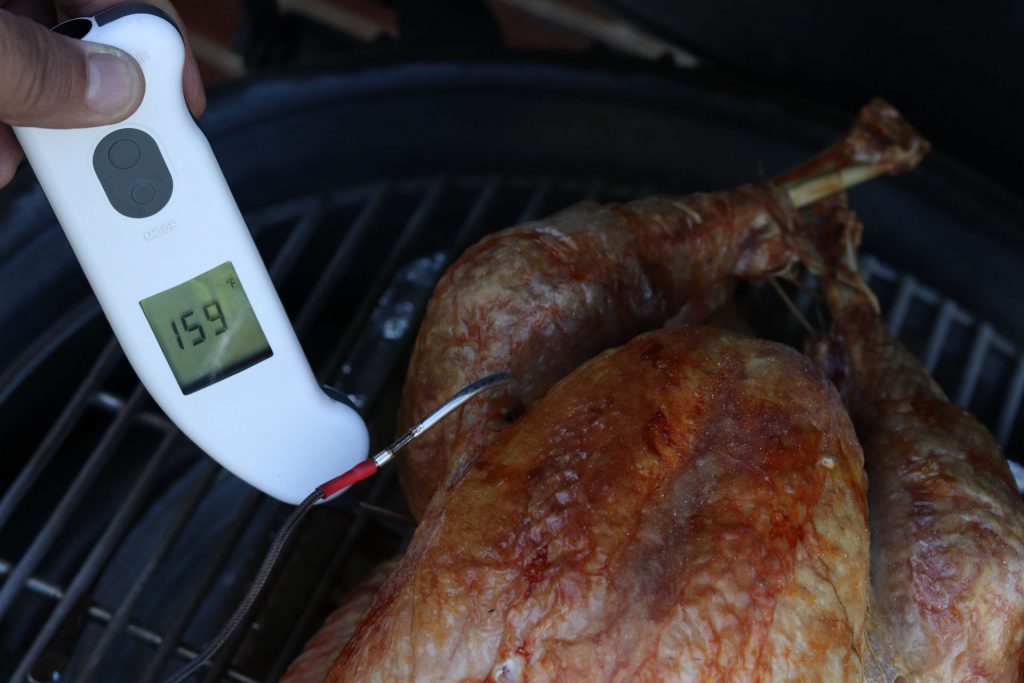
Almost there. Be sure to take your turkey temperature to at least 165°f.
Give it a rest!
Once your turkey is at 165°f, get it off the Big Green Egg and let it rest for 10-30 minutes. It can rest for up the 30 minutes without any issue.
If you're going to cover the turkey with foil for the resting time, make sure you do it loosely to allow moisture to escape. The steam will cause the turkey to lose any crispness you managed to get on the skin during the cook.
While your Turkey is resting is a great time to get your gravy ready. You can find a great simple gravy recipe in Robyn's write up on Charcoal Grilled Turkey.
It is true that there is a lot of information out there about cooking a turkey. The bottom line is all you need to do is: thaw your turkey, get in on the Big Green Egg, let it rest and serve. It's really just as simple as that.
Give your turkey a try on the Big Green Egg. You’ll be glad you did.
I’d love to hear all about your Big Green Egg Turkey methods in the comments below.
Till next time, happy grilling to you,
-Jon
Back to our Big Green Egg Series
For more Big Green Egg articles click on the following links:

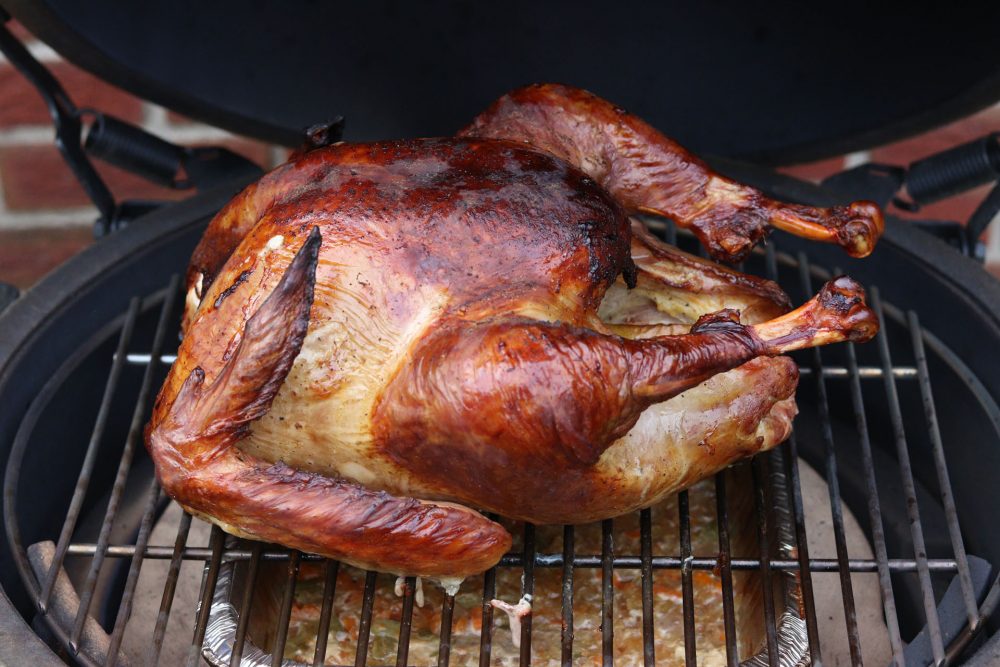


It makes me hungry.