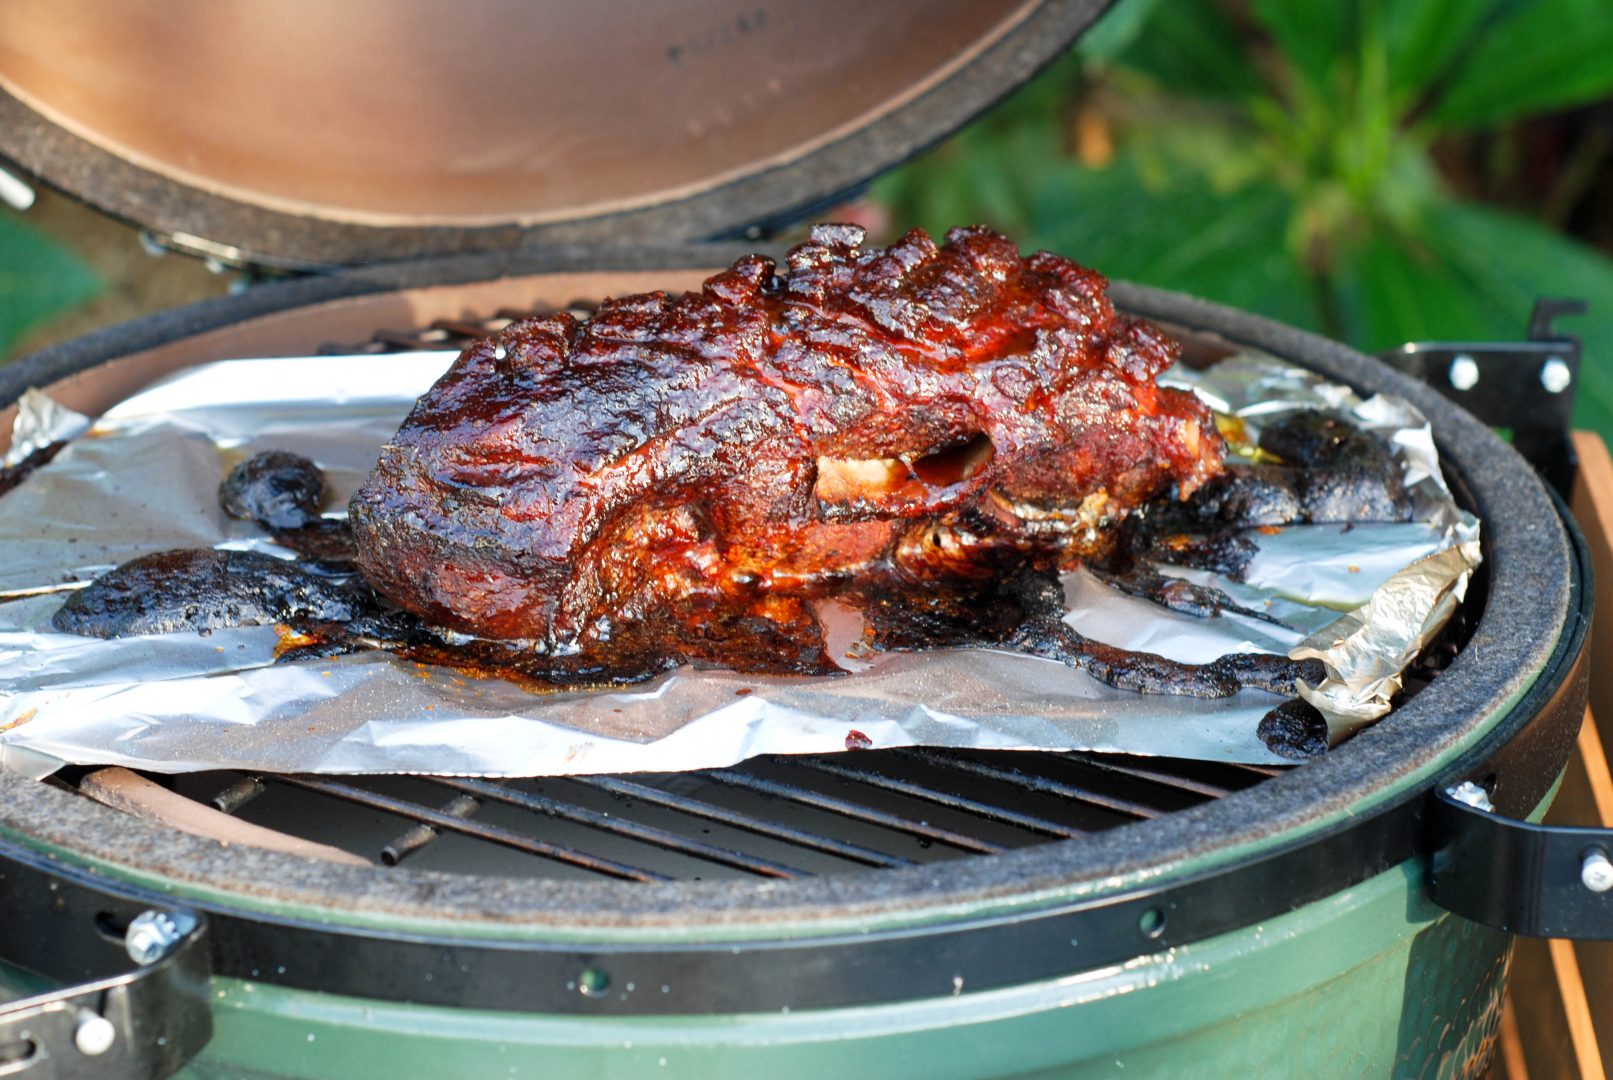
Pulled Pork on Big Green Egg!!
Note: This post is a part of the Big Green Egg Series, a deep dive into the popular Kamado style grill and all that it offers. Follow along on this adventure if you have ever been curious about getting an Egg or want to better understand how to get the most out of your Egg.
The gateway to BBQ meat.
Pulled pork! Now that you have the Big Green Egg, your entry into BBQ just got a whole lot easier. You don’t need to worry about fire management and temperature control; the Egg will take care off that so you can focus on the cooking.
So what is Pulled Pork? Wikipedia describes it as “a method of cooking pork where what would otherwise be a tough cut of meat is cooked slowly at low temperatures, allowing the meat to become tender enough so that it can be “pulled”, or easily broken into individual pieces. Pulled pork is found around the world in a variety of forms.”
I absolutely love pulled pork.
It is by far my favorite thing to do low and slow. It is extremely forgiving and a great way to get started in the world of BBQ.
The cut of meat used to create this velvety goodness is known as a Boston Butt. Oddly, this cut is from the top portion of the pig’s shoulder, not the rear. There are a few theories on how this cut earned its name, but that’s a story for another day. Right now, let’s get to cooking this butt from the shoulder of the pig.
The process for pulled pork on your Big Green Egg is straightforward. Let’s take this one step at a time.
Hardware you’ll need in addition to your Egg, meat, and charcoal:
- Disposable Aluminum Foil Half Pans
- Instant-read Thermometer
- Clean and Dry Cooler
- Gloves for Handling Hot Meat
- A Sharp Knife
The Meat
The Boston Butt is perfect for pulled pork. It is loaded with intermuscular fat as well as connective tissue. The fat inside helps to baste the meat internally, keeping it moist as it cooks. The connective tissue breaks down to gelatin during the low and slow cook. All this combines to give an amazing flavor and one of the most wonderful mouth feels ever!
Boston Butts are available at most mega-marts, and they are inexpensive. The ones in the store typically weigh somewhere from 6-10 lbs. They may also be referred to as other names. If you’re not sure, ask the butcher. If you want to really go for it when it comes to meat quality, you can’t go wrong with Snake River Farms.
Some butts are injected with a brine and sulfates. This is called “enhanced.” This injection allows the meat to keep on the store shelf longer. The enhancement also helps retain moisture and color of the meat. It’s not necessarily a bad thing. Competition BBQ teams inject their pork butts with sulfates all the time. Enhanced butts usually come from big mass producers. They tend to be priced lower than natural butts. This is because they add weight to the meat with the brine solution. They also tend to be trimmed up a bit and have less external fat. Check the label closely as you’re shopping for your butt. I prefer to go with the natural pork butts but will gladly cook enhance butts if that’s what available. There’s no wrong one to cook.

The Trim
Natural Boston Butts tend to have a large fat cap on one side. This fat cap needs to go. With a sharp knife, take shallow passes across the fat cap until it’s gone; you want to see the meat. If you can’t see the meat, neither can the smoke and spice. I like to trim and season the Butt the day before.
On a side note: you can hang onto this fat for use in making some fresh breakfast sausage or render it into some low-grade lard if you like. The fat freezes well.
The Rub
Let’s take a minute and talk about a few ways to get some spice on the Butt. One way is to buy a commercially produced BBQ rub. Sprinkle that on and you’re good to go. However, I prefer a different approach. I want to have better control of the flavor. I also want to have better control of the amount of salt that I get on the meat. Control the salt? Why? Well, if you can only pick one thing to get on your meat, it should be salt. At the end of the day, salt and fire make some amazing stuff. Everything else is a bonus.
If you’re going to use a ready-made rub skip down to The Cook; you do not want to double salt your meat. I highly recommend Robyn’s Sunshine State of Mind Craft BBQ Rub.

This Citrus infused rub is described as “The Crack of BBQ Rubs” by BGE Contributing writer Captain Ron.
Once the meat is trimmed I apply Morton Course Kosher salt at ¼ to ½ teaspoon per pound of meat. NOTE: If you’re going to use table salt, CUT THAT AMOUNT BY ½. Due to the size of the salt crystals, there is more salt in a measure of table salt than in kosher. Trust me on this.
Once the salt is on there, apply your spice mix. This can be whatever you like. Typical BBQ rubs contain sugar, paprika, onion, garlic powder, cumin, and black pepper, amongst other things. Don’t be afraid to get creative. I personally avoid sugar and carbs, so when I did the butt for this article I used 5-spice, onion powder, and black pepper. There is no wrong way to BBQ. You want to completely cover the meat with the spice rub. At the same time, you don’t want to cake it on.
With the Butt seasoned up, wrap it up in plastic kitchen wrap and get it in the fridge for the night.
The Cook
The Boston Butt is a BIG piece of meat. It’s going to take some time to cook. As I mentioned earlier, it’s extremely forgiving. You can cook this using a wide range of temperatures. It will do well with the Big Green Egg running anywhere from 225°f to 275°f or beyond. It’s possible but difficult to mess up.
Load your Big Green Egg with a good load of lump charcoal and get your fire going. If you need to know about how to do this please review my article, “How to Lay a Fire and Control the Temp in Your Big Green Egg.”
A word or two on wood for smoke
For me, lump charcoal gives a nice wood flavor. If you want more than that, add some wood chunks to your charcoal. Head to your local home improvement store and pick up a bag of cooking wood chunks; they will be in the charcoal aisle. Apple, cherry, and pecan are all good choices. If you want a bit stronger go with hickory. If you want smoke to the max, get yourself some mesquite wood.
Keep in mind that wood type is not that important in the big scheme. You have the lump charcoal making smoke, all your spices are going; you might very well be adding a sauce to the pulled pork. At the end of the day, the type of wood you’re using is a minor part of the equation. If you’re using it, add two or three chunks into your charcoal bed before lighting.
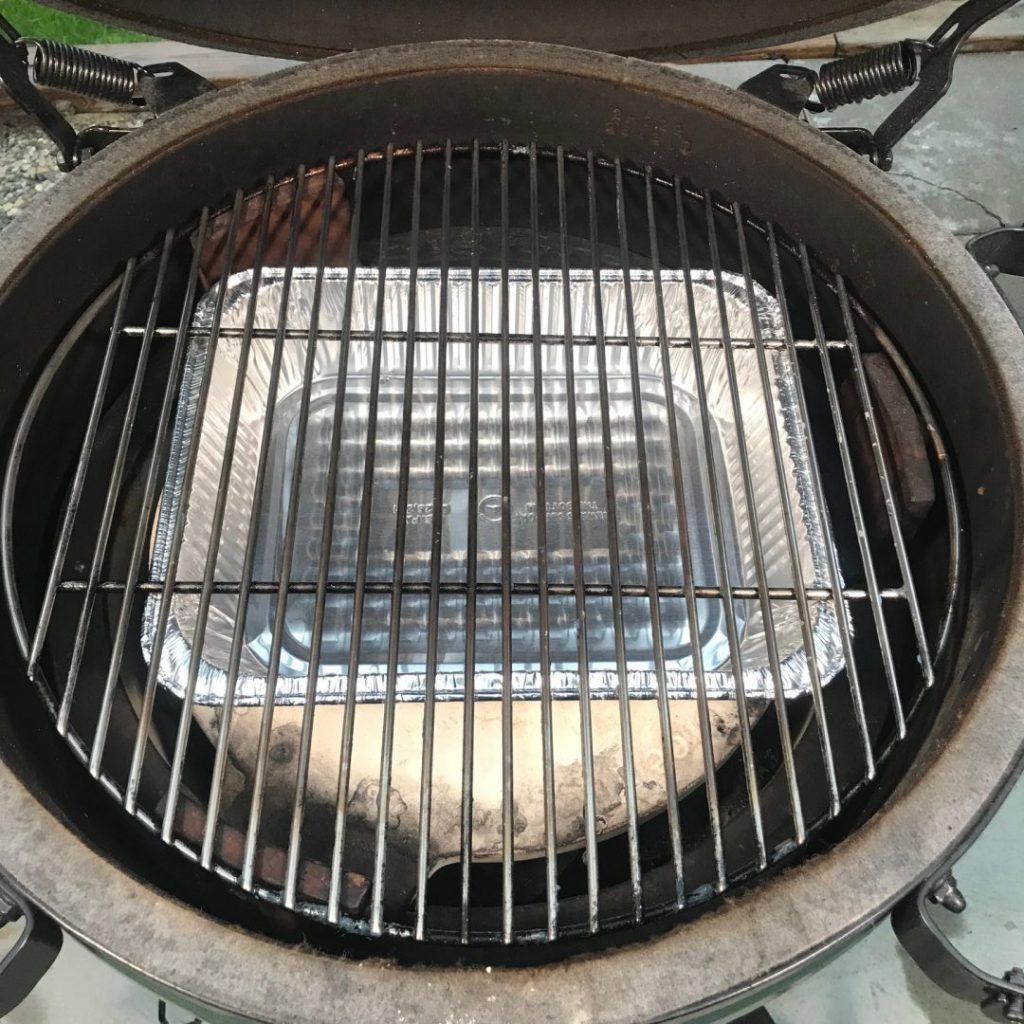
Place a disposable foil pan on top of the convEGGtor to catch the dripping and help with the clean-up
From the Fridge to the Egg
Once the fire is established, drop in your convEGGtor. I place a disposable foil pan on top of the convEGGtor to catch the dripping and help with the clean-up. Install the cooking grate and get the Egg running smoothly at the temperature you want. All cookers run just a little different from one another. My Egg likes to run at 250°f, so I go for that. Your Egg may run well and steady at 235°f. That’s okay; work with where your cooker wants to be. Many folks in the BBQ world think 225°f is a magic number. Trust me, it’s not. Once you have the temp stable, get your Boston Butt out of the fridge and onto the cooking grate. Go straight from the fridge to the Egg.
How long will this take?
Let’s talk a bit about timing. BBQ is full of contradiction. We say in BBQ that the meat is done when it’s done. We cook by the temperature of the meat, not by the amount of time in the Egg. While this is very true, we also know that BBQ can be done on a timeline and served when necessary. Here’s how we accomplish this…
As a general timeline, a Boston Butt takes 1 ½-2 hours per pound to cook at 225°f. If your trimmed Butt is 7 lbs. you’re going to need 14 hours to cook it (+- 30% ). We will be able to shave some time off this by wrapping the Butt in aluminum foil during the cook. We do this when the Butt reaches the point of the “stall”.
The Stall
The stall is when the moisture in the meat rises to the surface and evaporates, much like how a person sweats when it’s hot out. This is a natural cooling process. Evaporative cooling affects large cuts of meat, like a Boston Butt.
In the first few hours of the cook, the internal temperature (IT) will rise quickly. If you’re curious what internal temp any protein you’re cooking should reach, check out our BBQ Calculator! Once the IT gets to around the 150°f mark, the Butt will stall. The temp will sit there around 150° for hours. The I.T. may even drop a bit. It will sit in a stall if there is moisture in the meat that can evaporate. Do not adjust the temperature of the Egg! Let it be.
You have two options. You can ride out the stall OR you can wrap the meat tightly in aluminum foil and stop the evaporative cooling. I suggest you cook a Boston Butt both ways at some point. Practice makes for improvement.
Wrap it!
For today’s cook, we are going to wrap. We’re going to leave the butt unwrapped and in the stall for a good long time. Once you’re about seven hours into the cook, take the meat off the Egg and tightly wrap it in aluminum foil. Don’t rush when you do this. Take your time and get that foil on the meat tightly. Even a slight gap between the meat and the foil will allow for the butt to keep sweating. Get it on good, then add another layer just to ensure you’ve got it covered. Again, don’t rush. You have time to get this right.
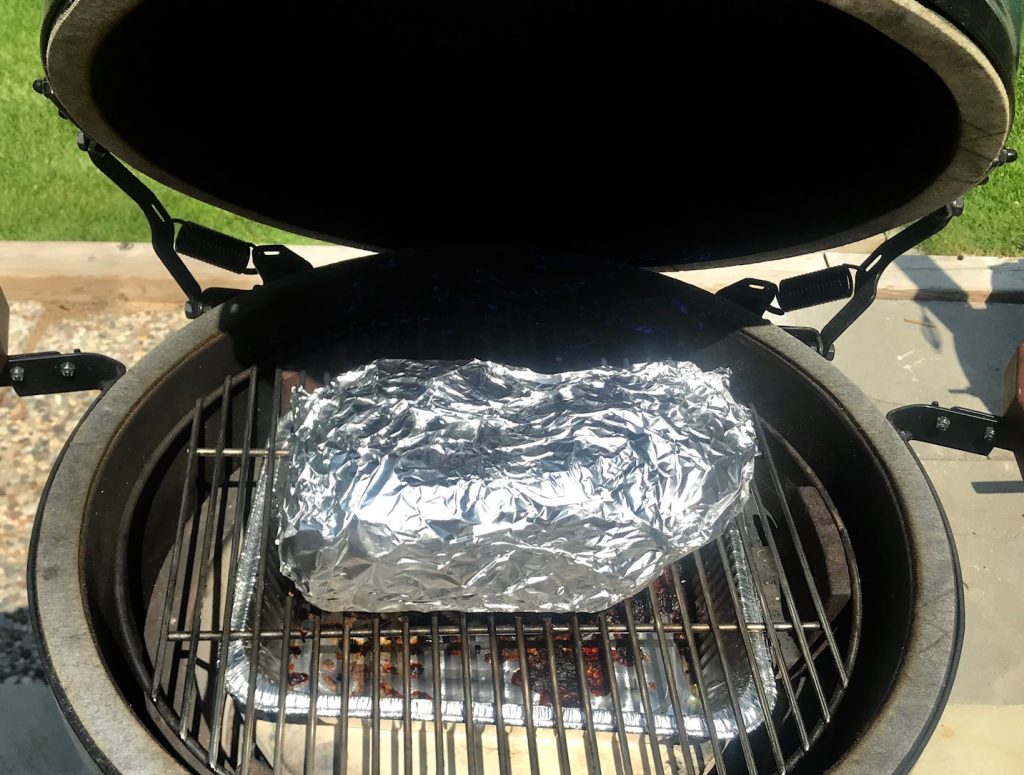
Even a slight gap between the meat and the foil will allow for the butt to keep sweating.
The cool-down
From here on out, check the IT with your instant-read thermometer (you know we like the Thermapen here) every 40 min or so. You’re looking for an IT of somewhere around 199°f to 203°f. Check more often as you start to get close to your finish temp range.
Once to get the IT to where you want it, remove Butt from the Egg and get it in a clean and empty cooler. Leave the foil on it. If an aluminum foil pan does not fit in your cooler, place some paper towels in the cooler first. This thing is going to leak some juice and this will aid in the cleanup. Close that cooler up and let the Butt sit in there for at least a half an hour. You can leave it in there for several hours if needed. It will hold at a safe temperature for an extremely long time.
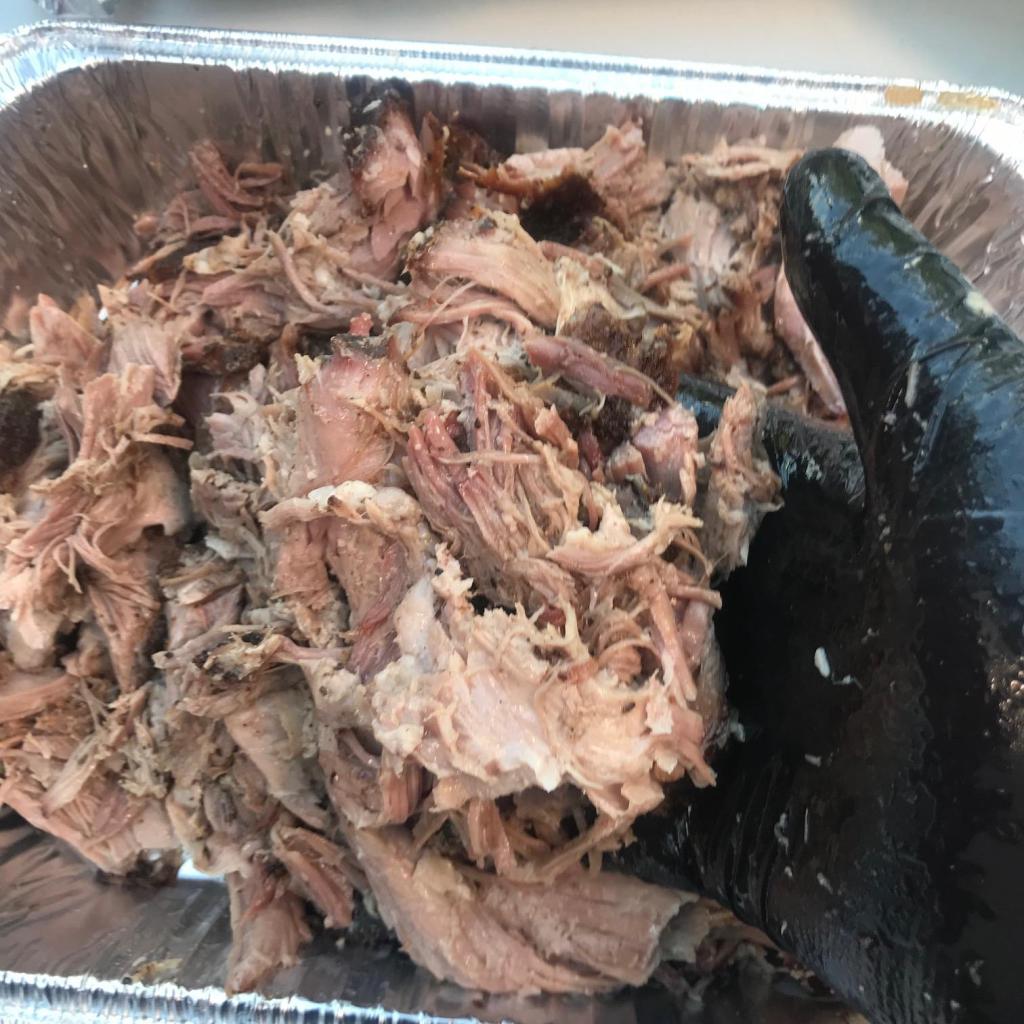
So, how does all this help us hit our serving time? If you set your schedule up to have the Boston Butt done 1 to 1 1/2 hours before you serve, it will be in the cooler hot and ready to pull at dinner time! When that time comes, get that Butt in a foil pan and start pulling. The bone should slide right out, and the meat should start to break into pieces. Just get your gloved hands in there and start pulling.

The bone should just slide right out.
There are so many things you can do with pulled pork, from sandwiches to BBQ pizza. Pulled pork is affordable, freezes well for future use and is always a hit with family and friends. If you spend the time with your Big Green Egg and a Boston Butt or two, you are well on your way to making better BBQ than you could ever imagine.

Thanks so much for checking it out! Until next time, happy grilling.
Jon

GrillGirl Contributor, Jon Solberg.
Jon Solberg, Expert Outdoor Cook who Makes His Own Charcoal!
 Enjoys long walks on the beach and good comedy….. Just kidding! A student of all things outdoor cooking, both low and slow or hot and fast. Charcoal, wood or gas it doesn’t matter. Not a big believer in the dogma of outdoor cooking. Continually looking for different ways. Loves to restore grills and smokers of all kinds. Born and raised in Mid-Michigan and understands there’s no offseason in live fire cooking.
**Affiliate links have been used in this post which means I could make a small commission if any products are purchased. I only recommend products I personally use and endorse. (Robyn)
That was tasty! Now let’s get into some real fun with the Big Green Egg’s accessory tools and expansion kit, like the EGGspander Multi Level Cooking System!
And, if you are looking for more recipes to make on your Big Green Egg, we have over 100 recipes developed specifically for the Big Green Egg!

