I know many cookers out there come with a dial thermometer already installed. You may be asking, “Why do I need another one?” Well, maybe you do and maybe you don’t. The thermometer that comes with your cooker may very well be accurate, but that thermometer is not located on the same level of whatever it is you’re cooking. They are typically located higher than that the cooking surface. Heat rises, so the temperature at the cooking grate is naturally going to be lower than at the thermometer. Couple this with the possible inaccuracy of the built-in thermometer and you could easily be off by as much as 100°f.

The distance between the grate and the dial can make all the difference in the world when it comes to temperature.
This is a good time to introduce another concept. The temperature inside your cooker is not actually consistent and can vary from one side of the cooker to the other. It varies from side to side, front to back, up and down. If you placed four probes in a cooker in four different spots, you're going to get four different temperature readings. Sounds crazy, but its true.
There’s a lot going on inside a cooker: rising hot air from the fire rolling off the top, cold air from the meat falling down, hot air waiting in line to get out of the open vent. A LOT going on. It’s a little weather system of sorts. Below is a chart I ran using three probes to try and demonstrate what I’m saying a bit better.

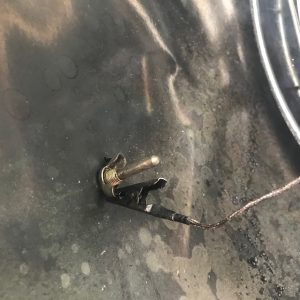
The red line shows the temperature of the grill where the dial thermometer is built in. I actually attached a digital probe to it, as seen in this image:

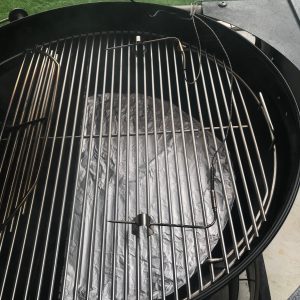
The yellow and light blue lines on the chart show temperatures of two probes attached to the cooking grate of the grill. They are about 12-14” apart, as seen here:

The dial thermometer in this cooker is reading accurately. It's just located much higher than the cooking grate that at times and the temperature there is as much as 50° hotter than the temp at the grate. You can also see that the two probes on the cooking grate can be as much as 20° different from one another.
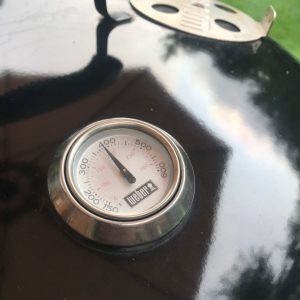
These two images show the dial and the digital readout of the probe.


You can see its pretty close. I can deduce that the built-in dial thermometer is accurate. It's just not located where my food is cooking. I can still use the built-in dial to give me an idea of what the temperature is at the cooking grate once I know its fairly accurate and the difference it typically reads from the cooking grate. In this case, I can assume that the grate temperature is about 50°lower than what the dial is reading.
As for the probes on the cooking grate, they are not the same. At first glance, you might say, “The thermometer is wrong.” This is not the case. I blame this on the weather inside that cooker. This is okay. Try not to get hung up on the temperature variation inside your cooker. Even with these differences, you're going to make great food. Worrying about the difference will make you crazy! Learn to cook the way your cooker naturally wants to run. Don’t fight it. Work with these differences and use them to your advantage.
Checking your instant-read thermometers.
It’s important to trust your thermometer. It doesn’t have to be perfect. It's not like we are developing a world-saving vaccine that requires perfection. Even if your thermometer is off a bit, you can easily find out by how much. Some thermometers are adjustable so you can make a correction in the readout once you know what it should be telling you. Even if you can’t adjust yours, at least you’ll know how far it’s off and can make a mental correction.
Here are ways you can check the accuracy of your thermometer:
Checking a thermometer is referred to as “calibrating.” In all fairness, there is a whole lot of science to temperature measurement. The way science determines the correctness of a temperature-measuring device is with a three-point method. This is where the temperature is measured at three different degrees. For us in the kitchen, it’s just not practical. Dare I say not necessary? You can easily achieve a two-point method in the kitchen if you like. I personally feel comfortable with a one-point method.
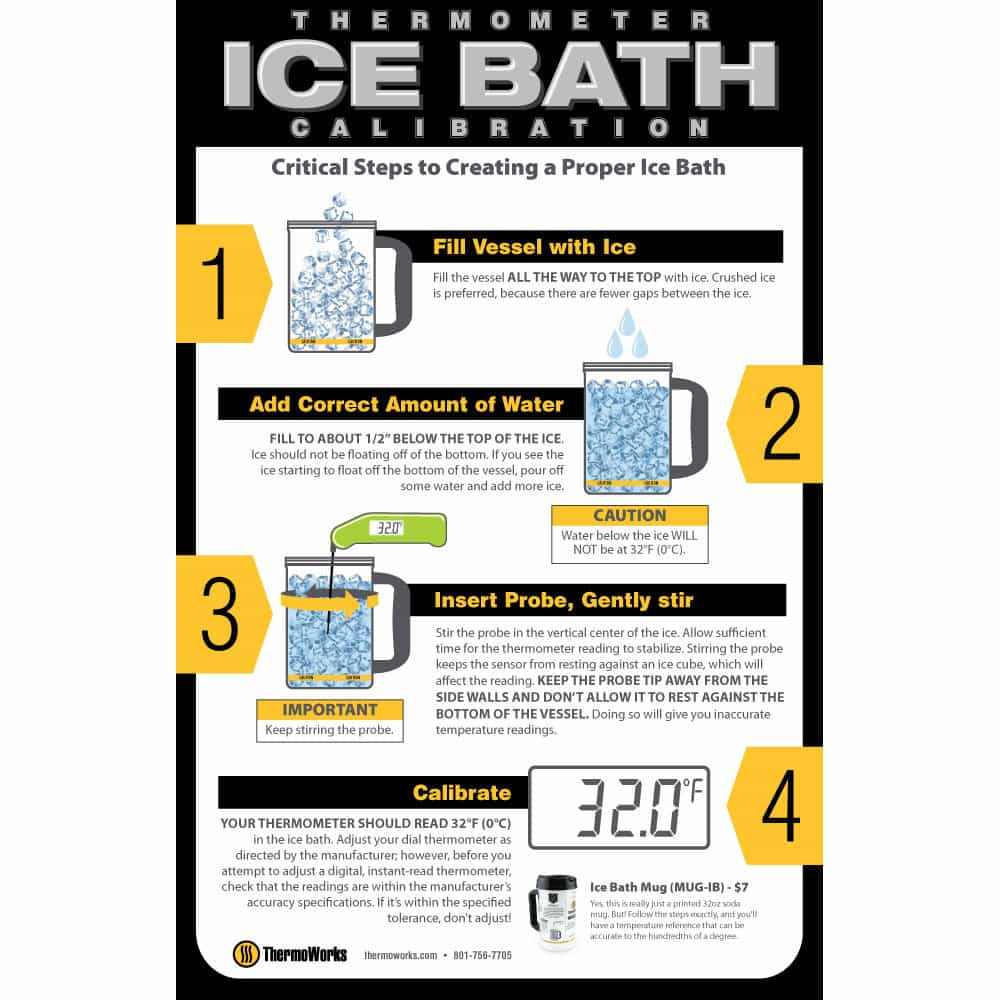
The Ice Bath Calibration
This is the safest, simplest, and easiest way to calibrate your thermometer. I don’t think I can do a better job at explaining it than the poster below from ThermoWorks:

Boiling Point Calibration
This test has a few more moving parts. The first thing you need to know is what the boiling point of water is where you live. Water boils at 212°f at seas level, but for every 500 ft. you go up in elevation the boiling point goes down a degree. I live about 600 ft. above sea level, so my boiling point is 211°f.
Fill a saucepan with four or so inches of water. There is an argument out there that this should be distilled water. You’re going to be just fine if you use tap water. Throw that pan on the stove on high heat. Let the water come to a boil the does not stop when you stir the water. Place the tip of the thermometer probe in the boiling water until the reading stabilizes.
Once you know what your thermometer is doing, it will be easy to trust it. If something tells you it's not reading correctly, now you have the tools to find out for yourself.
Until next time, Happy Grilling!
Jon

GrillGirl Contributor, Jon Solberg.
Jon Solberg, Expert Outdoor Cook who Makes His Own Charcoal!
 Enjoys long walks on the beach and good comedy….. Just kidding! A student of all things outdoor cooking, both low and slow or hot and fast. Charcoal, wood or gas it doesn’t matter. Not a big believer in the dogma of outdoor cooking. Continually looking for different ways. Loves to restore grills and smokers of all kinds. Born and raised in Mid-Michigan and understands there’s no offseason in live fire cooking.


