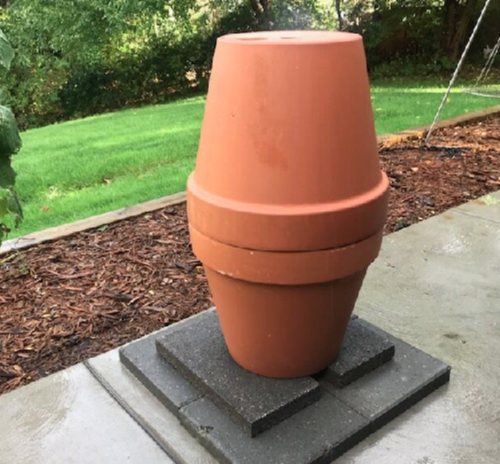
Awww yes, the infamous flowerpot smoker. A few years back a much-respected TV show host did some great shows on BBQ, in one of those episodes he took a few terra cotta flowerpots and made a great DIY Kamado smoker.
Brief history and etymology
I’m going to stop here and talk about the word Kamado. Kamado is a Japanese cookstove, which is fueled by charcoal or wood. The literal translation of the word means, “place for the cauldron.”

There is a moveable style Kamado – the mushikamado. This moveable cooked is a round clay pot with a dowed clay lid. The story gets fuzzy as to how the mushikamado made its way here but most agree it was after World War II. Somewhere along the line the mushi fell off the Kamado and they became just Kamado cookers.
So where am I going here? The clay pot smoker from the TV show was a very basic form of mushikamado. There are lots of these styles of cookers available today. In all sizes and price ranges and made from all types of materials. The Big Green Egg is a perfect example of a modern American Kamado grill.

Gathering ingredients
So, when Robyn threw out the idea of putting together a clay pot Kamado cooker, I was all for it! The design is simple. A terra-cotta pot base, a lid, and a heat source. Living in the north, terra cotta pots are a bit of a seasonal item. Its fall so finding the 20-inch pot like the one used in the TV show was a problem. I was able to find a good supply of 16” pots but I was not able to get a clay saucer to use as a lid; I went with two 16-inch pots one on top of the other.
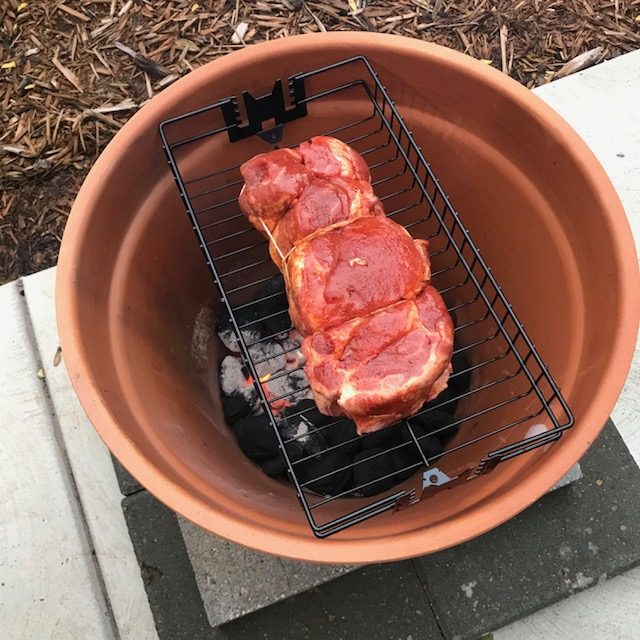
I was also able to pickup a wire rack from a rotisserie that fit nicely into the pot. Originally mushikamados were coal or wood fired, so I just decided to give some charcoal a try.
I thought it best to do some dry runs just to see for the pots handled the charcoal. First, I put some patio stones down to protect the concrete. I keep a few of these around the cook area. They are handy for all kinds of things and only cost a dollar or two.

I lined the base with Kingsford briquettes around the outside of the base, leaving the hole in the bottom of the pot open. Then, I lit 4 briquettes in a chimney and added them in. After several of the coals got going I put the top lid on. I dropped a Maverick thermometer probe in the top pot hole and waited to see what would happen.
It took a while to get up to temp but when it did the cooker rose to the magic number of 224°F and it stayed there. The outside of the pot was fairly cool. about 110°F at the base. The air temperature outside was in the mid 70’s. The wind was not a factor. This test fire lasted about 4 hours. The temperature held true most of that time. This will be a snap I thought. Tomorrow it’s time to cook.

Maiden Voyage
I grabbed a small 5-pound chunk of boneless pork shoulder and split that in half for the maiden voyage. Then, I grabbed a bottle of Butcher BBQ Honey rub and gave the pork a nice dusting. Got that back into the fridge while I got the smoker up to temp. I used the same charcoal arrangements, but the cooker was struggling to get up to temp.
The fact that it was 20° cooler than the previous day was creating an issue. Increasing air flow for the clay pots is not really an option. So I added more Kingsford briquettes and gave them some time to get them going. It’s important not to block the hole in the bottom of the cooker as that would restrict the airflow. This will reduce the amount of fuel that could burn and lower the temp inside the cooker.
Once I was comfortable with the raising temp inside, it was time to start smoking our pork shoulder.

From here on out the whole cooking method was pretty much set and forget. I monitored the internal temperature of the pork with a Thermapen. I added unlit Kingsford when I saw the cooker temperature start to fall off a bit. Then, I foil-wrapped it when it reached an internal temperature of 180°F and got the post off the cooker when it reached an internal temperature of 202°F.
We at GrillGirl.com recommend using a Thermapen to check internal temperatures >>

The final results? Amazing pulled pork. All and all this was a blast. Simple, easy to do. Repeatable. I’m looking forward to more smoked goodness from this great DIY Kamado cooker!


GrillGirl’s newest contributor, Jon Solberg.
Jon Solberg, Expert Outdoor Cook who Makes His Own Charcoal!
**affiliate links were used in this post
Check out these related posts!


