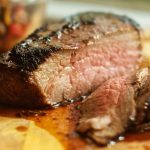
Start by setting up your grill for a little indirect cooking. If you’re using a gas grill assign cold and hot zones inside the cooker. Searing a hunk of meat this size over direct heat will scorch the outside before the middle has a chance to catch up. A good goal to shoot for is roughly 200 to 250°F on the cool side the pit. Using this technique (indirect cooking) will ensure you don’t screw the pooch on your first Tri-Tip dinner.
Place the meat on the cooler side of the pit with the thicker end closer to the heat. Close the lid and let leave it alone for 20 minutes. Give it a flip and cover again. You’re going to look for the meat to come to an internal temp of 110°F, or about 10° below your target temp. Grab a beverage and be patient, this can take as long as 30-45 minutes.
Once you’ve reached 10° below your target temp, move the meat to the hot side of the pit and sear the outer layer. About 5 minutes on each side should suffice. Remove from the heat, cover and let rest for about 20 minutes.
The Cut
Before you unsheathe your carving knife, consider how you’re going to approach this foreign mass nestled on your cutting board. And speaking of cutting boards, make sure you’ve got ample drip space because a Tri-Tip cooked to medium rare or less will flood your counter top. Don’t say I didn’t warn you!
Start by slicing the Tri-Tip in half through the center. Rotate each half and cut it from the tip to the end, against the grain. How thick you cut is up to you, however I like 1/2” slices fanned out over a plate with the excess juices poured over the top. Serve with garlic bread to sop up the drippings and enjoy!
After you’ve mastered the cook, play with your seasonings, rubs and overall flavors. Salt and pepper will go a long way to providing maximum flavor, but a little sweet and spicy will accent your Tri-Tip nicely. Try your favorite BBQ rub, or create one of your own.
